
Upscale images to 4K without losing quality
Why traditional "zoom" always blurs
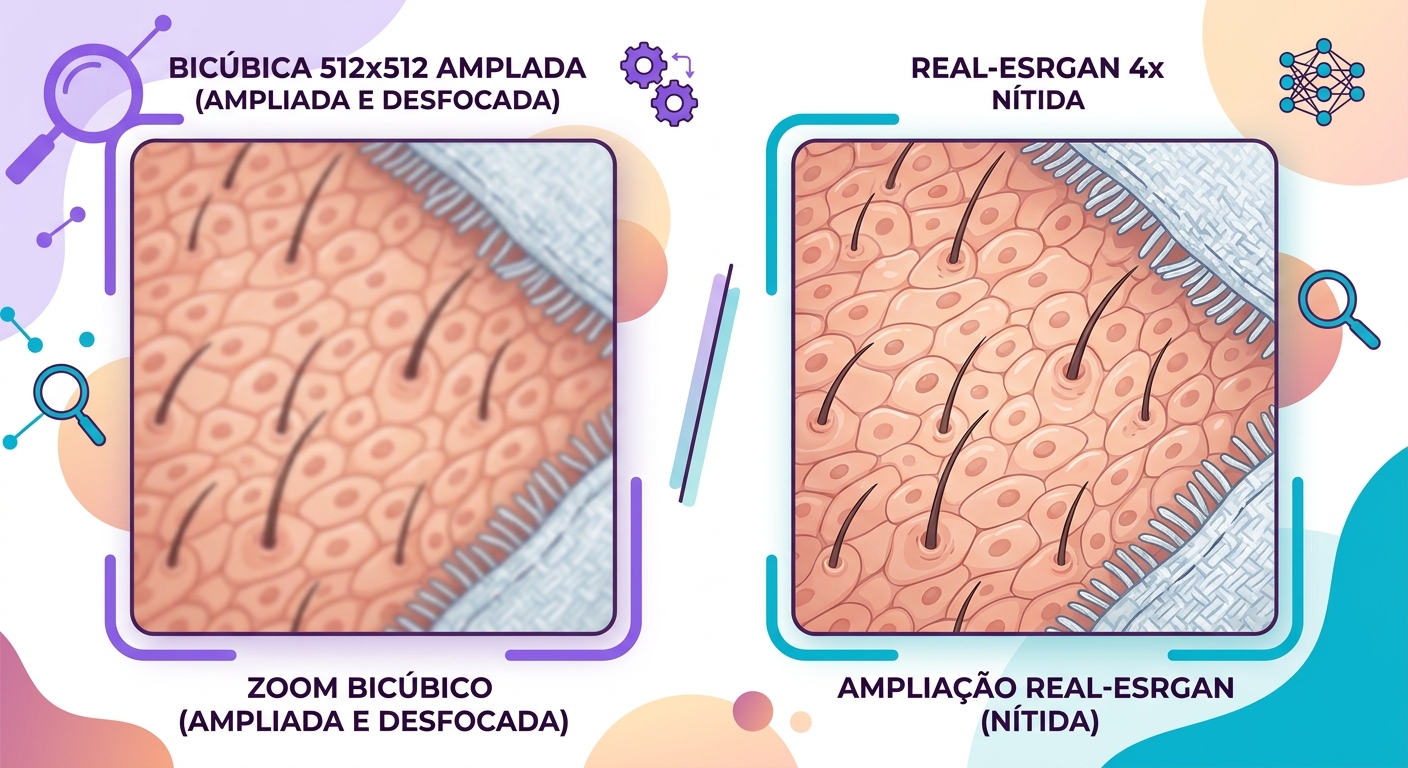
When you enlarge a photo in Photoshop using Bicubic or Lanczos, the algorithm fills new pixels as a weighted average of their neighbors. That's mathematically clean, but the result is always blurry — because information that didn't exist can't just appear. You took a 512×512 image (262k pixels) and invented the 768 thousand intermediate pixels from what was already there.
Modern AI solves this in a fundamentally different way: instead of interpolating, it generates what was most likely there. Models like Real-ESRGAN were trained on millions of pairs (low-res, high-res) and learned to "hallucinate" plausible details — hair, skin, texture, edges — that are consistent with what you see in the original image.
What the model "knows" about real photos
Real-ESRGAN and its relatives were trained on enormous datasets of photos at various scales. They learn statistical priors — meaning what nearby pixels "normally" look like when they're in a region of skin vs. fabric vs. metal vs. leaves. When you feed in a low-res photo, the model says: "this region is probably a cheek; cheeks in high resolution have these characteristics."
This is powerful, but it comes with a side effect: the model will invent details that look correct but aren't faithful to the original image. In journalistic or forensic photos this is problematic; for creative use, it's exactly what you want.
When to use Real-ESRGAN vs. GFPGAN vs. others
The choice of model depends on what you're upscaling:
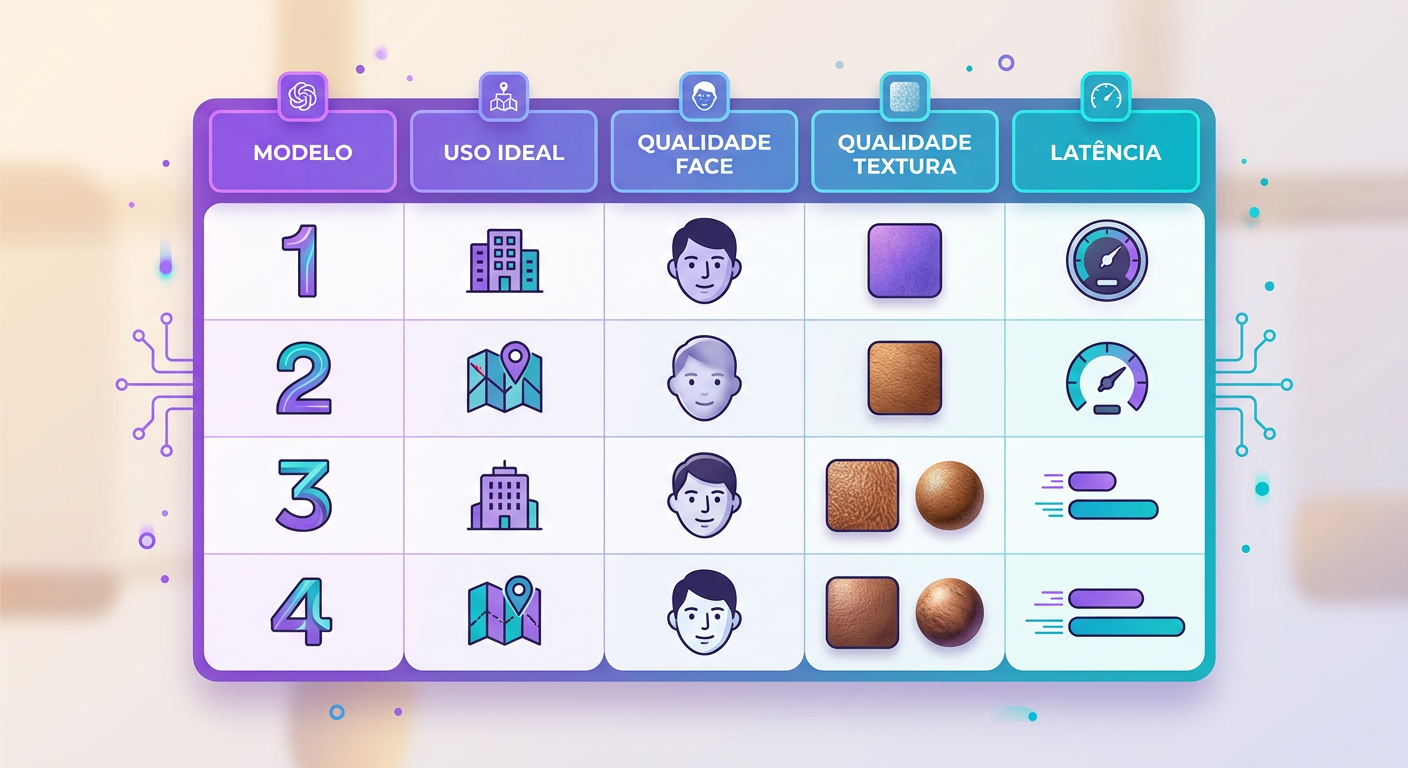
- Real-ESRGAN: general use (photos, screenshots, graphics). Produces a more "natural" sharpness. Medium computational cost.
- GFPGAN: specifically for faces. If your image includes a person, it's worth processing faces separately — GFPGAN reconstructs eyes, mouths, and hair with far superior quality in those regions.
- SwinIR: a more conservative alternative — less "hallucination", more fidelity. Best for technical images or documents.
- Combined pipeline: Real-ESRGAN for the full image, then GFPGAN replacing only the face regions. At Brainiall we run this combo automatically whenever we detect faces in the image.
Limitations you need to know
- Text in the image: small letters turn into scribbles if the input is very poor quality. The model "knows" what text looks like but can't read what was actually there — if you can't tell a B from an 8 in the original, the AI picks one and moves on.
- Amplified noise: photos with heavy grain will have that grain "invented" alongside the details. Apply denoise before upscaling for a clean result.
- JPEG artifacts: if the original has visible JPEG compression blocks, the model may reinforce them. Use the "anti-artifact" preset when available.
- Stylized compositions: art, paintings, and vector illustrations can come out looking "over-photographed" — use art-specific models (Real-ESRGAN Anime, for example) in those cases.
Use cases that make it worth it
- Old photo restoration: 600×400 scanned image → print-ready 4K
- E-commerce: low-resolution supplier photos → high-quality, web-ready images
- Print: web images for banners or billboards without pixelation
- Legacy files: 90s video game screenshots, VHS-captured footage, and more.
Try it right now
In the Brainiall chat, send a low-res image and ask "upscale this image 4x". Include in your prompt whether the image has faces (to activate the combined GFPGAN pipeline). Results in 3–8 seconds, depending on size. The Pro Plan at $29/month includes 100 upscales per month.